Okay! Here I go again…. I will try to keep everything simple while I am going deep and deep down to hell of the SD-WAN HA configurations, I am not sure if I’ll be able to show everything related to the HA setup, but I will be doing my best while I am studying and learning about how this work at the same time…
My plan is to put my focus on build and configure an HA controller’s environment, so probably I will not add more than one or two cEdge to this topology (well how knows… well see).
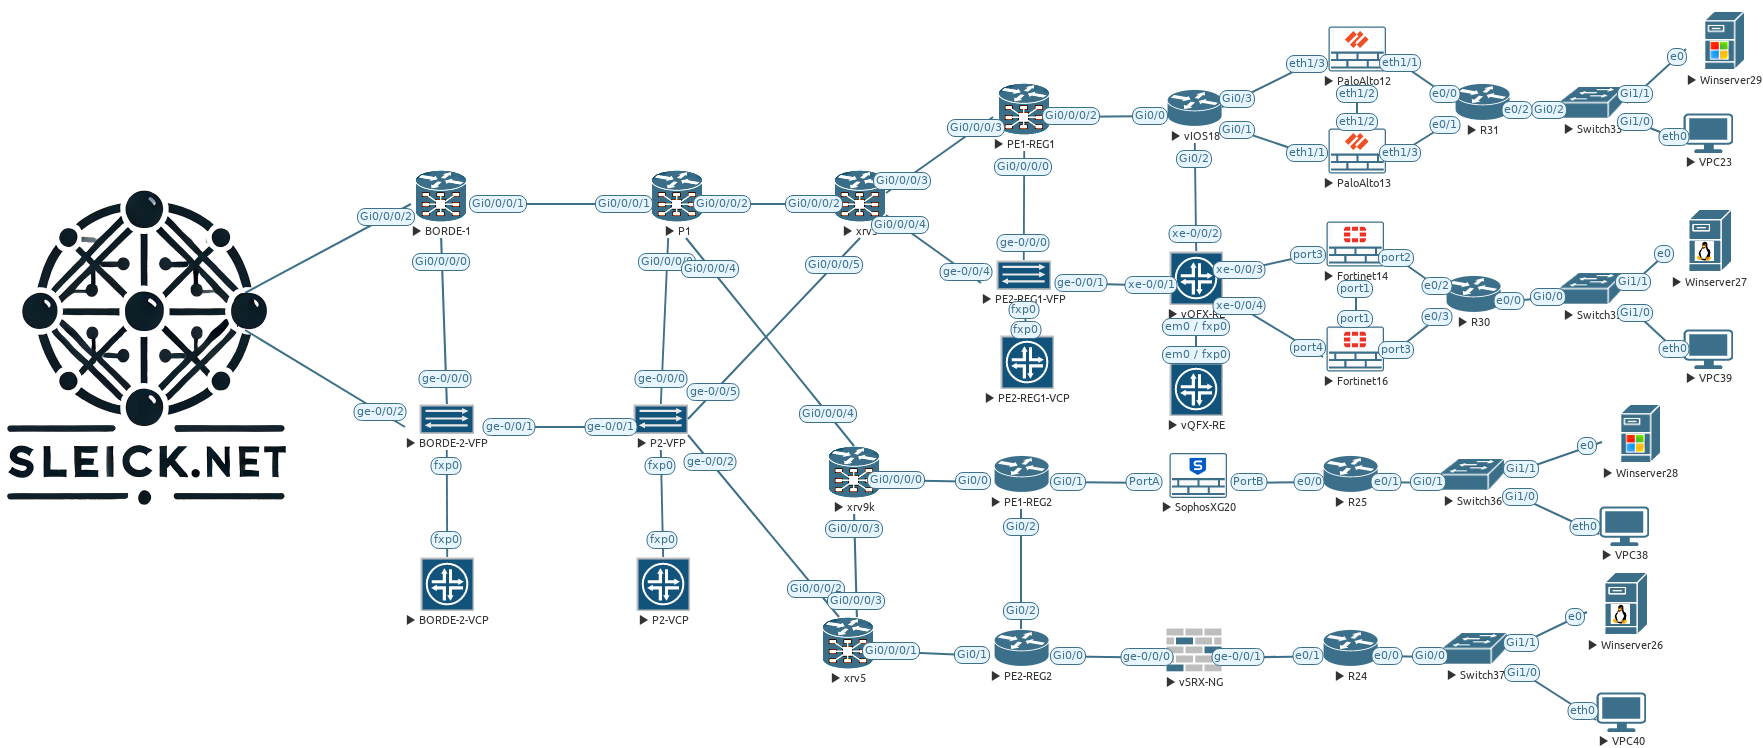
SD-WAN Topology Base
Probably is going to be good idea if I analyze the most important guidelines that Cisco provide us to build this cluster:
- vManager cluster consist in at least three devices connected each other, with this mandatory number of controllers we will avoid issues like split brain when we only have two devices working together and one of them fail, also we should have in consideration the kind of persona selected at the moment of first boot when we are installing the software on the controller. Remember during the first vManage boot, we are able to choose which persona (characteristics) will have the controller that we are deploying, this is important because we can only have:
- Computer + data: (Application services, statistics, configuration, messaging and coordination), this can be used in standalone mode as well as in cluster mode, also this mode should be used by controller in our SD-WAN environment.
- I will go for this option, since all the three vManage that I deployed are configured as Computer + data persona.
- Compute: (Application services, configuration, messaging and coordination), this node can’t operate in standalone mode and must be part of a cluster.
- Data: (Application services and statistics), this node can’t operate in standalone mode and must be part of a cluster.
- Computer + data: (Application services, statistics, configuration, messaging and coordination), this can be used in standalone mode as well as in cluster mode, also this mode should be used by controller in our SD-WAN environment.
- All the vManage should be located on the same data center and all of the participants should be under the same subnet, on further post I will explore how to expand this with more controller in a different location.
- To complement what I said above, Cisco recommends having no more than 5 ms of latency between all controllers and use another different interface than we will be using for the data traffic, this interface could 1G or 10G (recommended).
- Cluster IP should not be reachable externally.
- Don’t use DHCP on the interface used to build your cluster
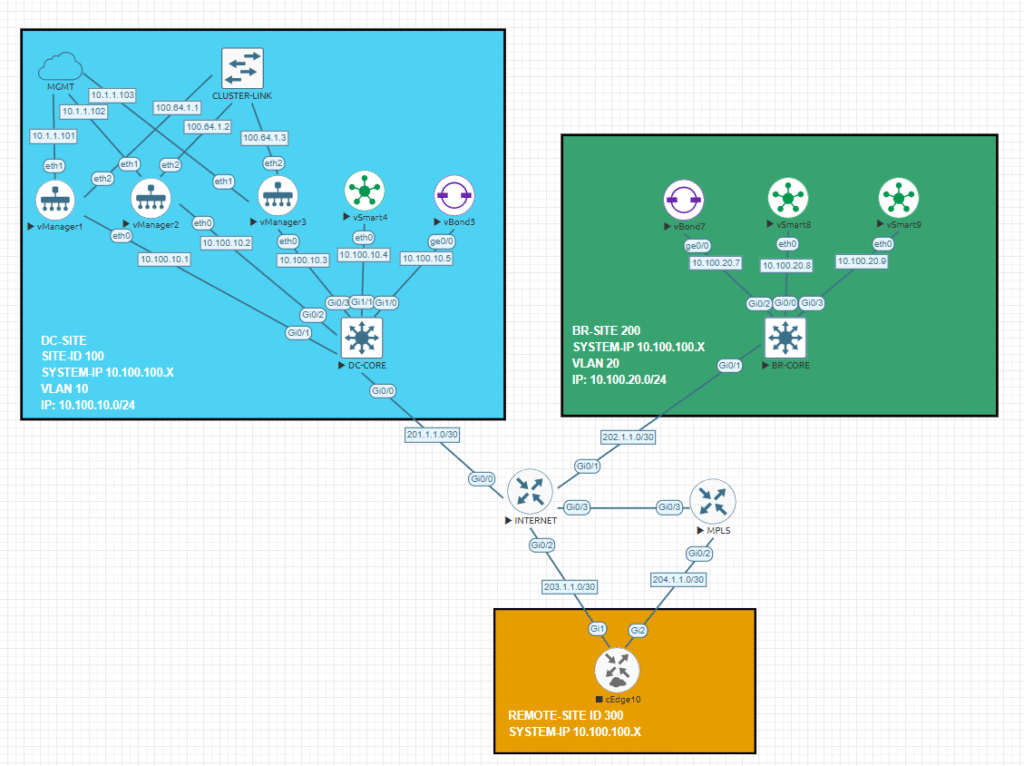
Cisco SW-WAN manager offers us two ways to achieve an HA environment, first one is through the creation of cluster of three vManager devices connected to each other using an existing interface in the VPN 0, as I mentioned before in this configuration our three managers needs to be connected to the same broadcast domain, in my lab I used a bridge cloud provided by EVE-NG to connect them together. At the end of the days, the problem with that setup is we will have all three managers under the same location, but what if we need georedundancy? Well, we can expand our cluster and build another cluster acting as an active/pasive solution, but this is something that I will try to achieve in later post.
Step 1 – Install and Get Ready
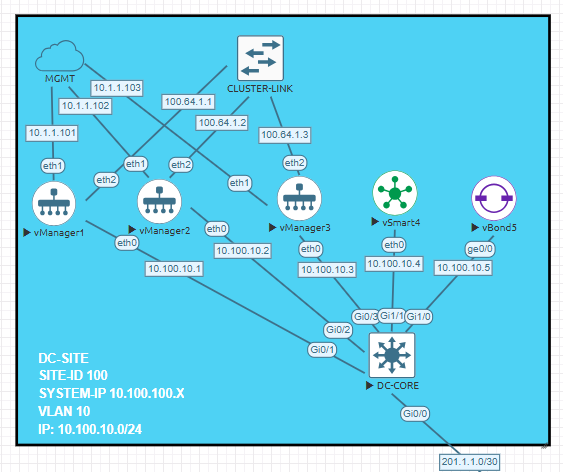
My three managers are connected each other using its own L2 bridge connection with an IP address which can’t be reached from the rest of my network, below you will find the relevant configuration of the three managers:
vManager1
system
 host-name             vManager1
 system-ip             10.100.100.1
 site-id               100
 sp-organization-name  sleick
 organization-name     sleick
 vbond vbond.sleick.net
!
vpn 0
 dns 10.255.255.1 primary
 interface eth0
  ip address 10.100.10.1/24
  ipv6 dhcp-client
  tunnel-interface
   allow-service all
   allow-service dhcp
   allow-service dns
   allow-service icmp
   no allow-service sshd
   no allow-service netconf
   no allow-service ntp
   no allow-service stun
   allow-service https
  !
  no shutdown
 !
 interface eth2
  ip address 100.64.1.1/24
  no shutdown
 !
 ip route 0.0.0.0/0 10.100.10.254
vManager2
system
 host-name             vManager2
 system-ip             10.100.100.2
 site-id               100
 sp-organization-name  sleick
 organization-name     sleick
 vbond vbond.sleick.net
!
vpn 0
 dns 10.255.255.1 primary
 interface eth0
  ip address 10.100.10.2/24
  ipv6 dhcp-client
  tunnel-interface
   allow-service all
   allow-service dhcp
   allow-service dns
   allow-service icmp
   no allow-service sshd
   no allow-service netconf
   no allow-service ntp
   no allow-service stun
   allow-service https
  !
  no shutdown
 !
 interface eth2
  ip address 100.64.1.2/24
  no shutdown
 !
 ip route 0.0.0.0/0 10.100.10.254
vManager3
system
host-name vManage3
system-ip 10.100.100.3
site-id 100
sp-organization-name sleick
organization-name sleick
vbond vbond.sleick.net
!
vpn 0
dns 10.255.255.1 primary
interface eth0
ip address 10.100.10.3/24
ipv6 dhcp-client
tunnel-interface
allow-service all
allow-service dhcp
allow-service dns
allow-service icmp
no allow-service sshd
no allow-service netconf
no allow-service ntp
no allow-service stun
allow-service https
!
no shutdown
!
interface eth2
ip address 100.64.1.3/24
no shutdown
!
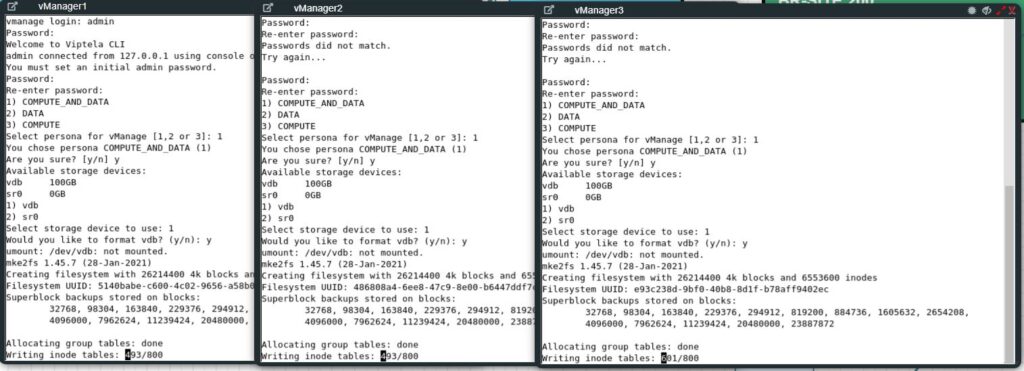
ip route 0.0.0.0/0 10.100.10.254Nothing new until this point, but now we will get started on building this cluster… Like any other fresh installation, our managers will not have anything inside so I need to choose the type of persona device will be and apply the configuration above, my VPN 512 subnet is directly connected to my local environment to make my life easier configuring these devices.
Step 2 – Basic Manager Configurations
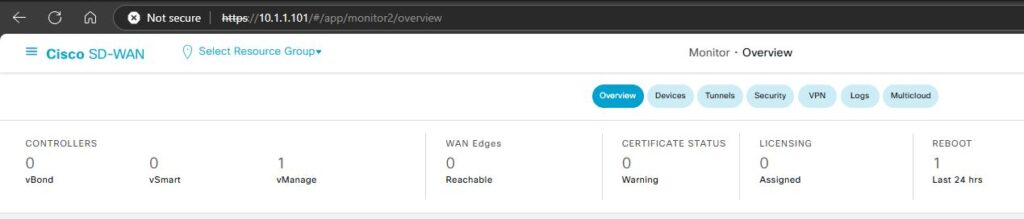
After 10 or 15 minutes, all my three managers are ready to start, as you can see below, my first manager is completely empty, and no other devices are managed (yet…).
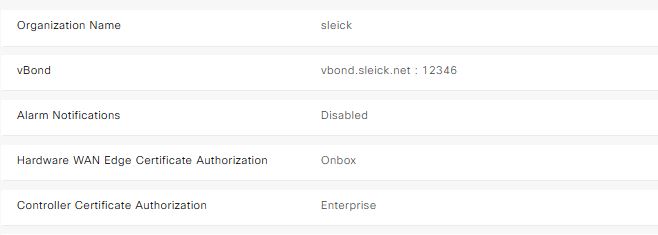
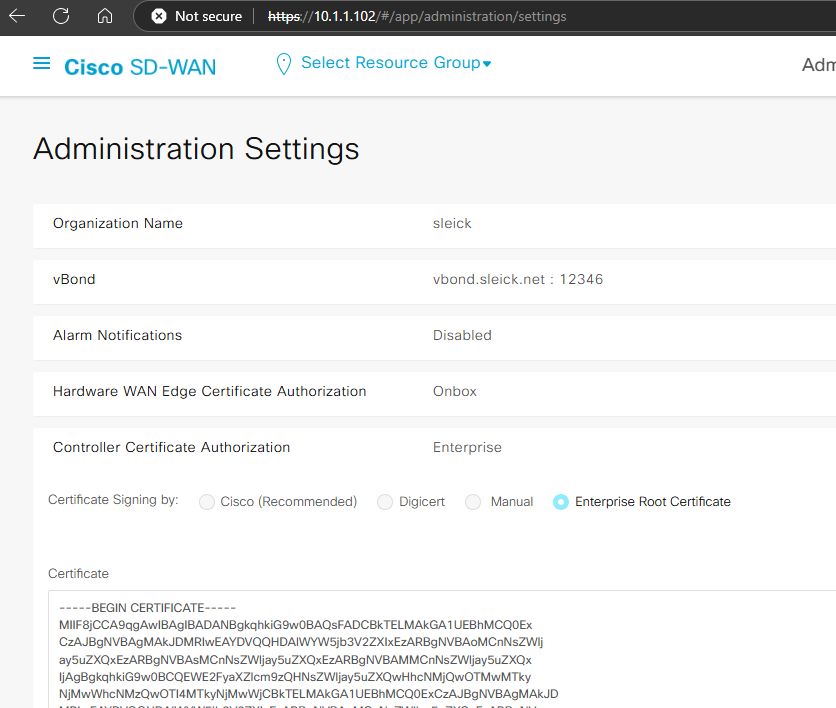
Now I will apply the normal day 0 configurations like the organization name, orchestrator FQDN, certificate etc… With this setting, our manager have configured the organization name as well as who will be the Validator device (vBond) and what kind of certificate I will be using to authorize the devices managed by managers.
Step 3 – Change Localhost for Cluster IP Address
Under the Administration —> Cluster Management tab we will find the Manager status of the entire cluster, at the moment this device is working in standalone mode since no other manager have been added this cluster, some important aspect that we could find as well from this screen is how is the status each of the internal services is running on this device (Under the Service Reachability tab), as well as what kind of persona has been used during the installation process.

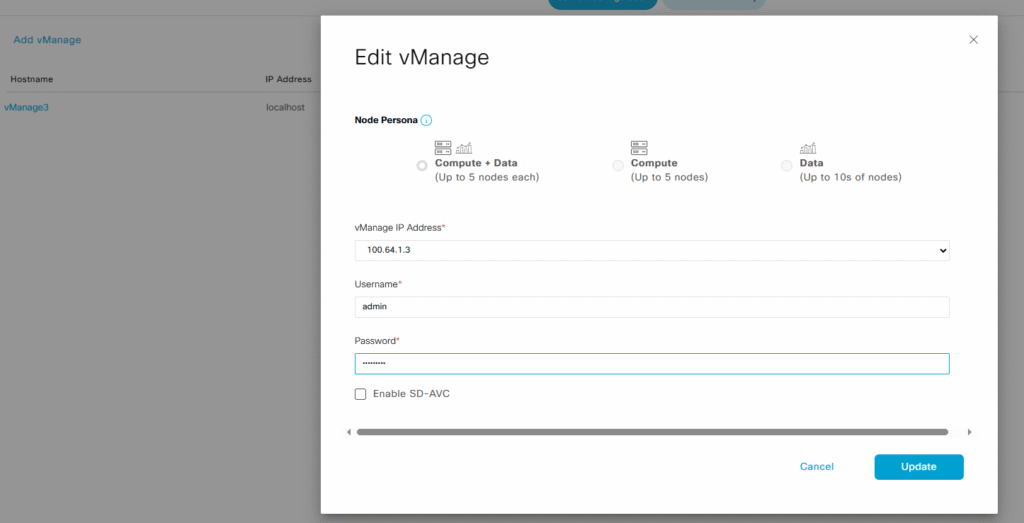
The key point here is the IP address used by our manager, as you can see above, the IP address is expressed as Localhost, if we want to add more manager to this cluster, we will need to change that to the IP address that we previously designated in the VPN 0 to be used as cluster IP. Clicking the three dots at the end of the manager information we will be able to modify the manager IP, in this case I selected the IP 100.61.1.0/24 (mostly used by CGNAT), add the admin username and password and then click update,
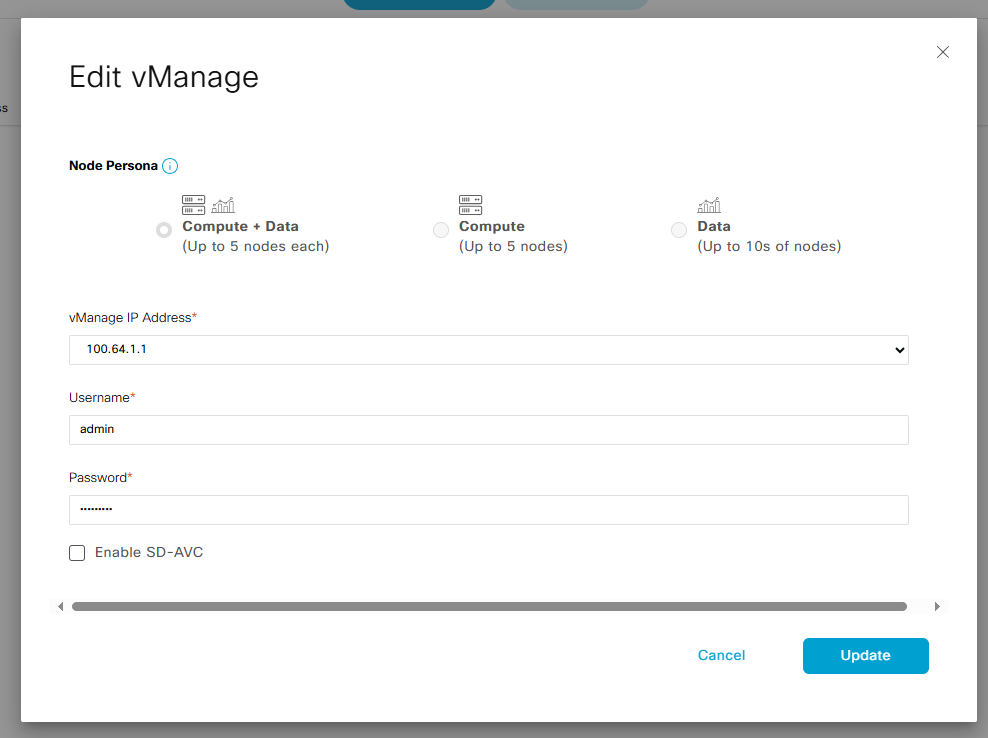
note: I will not enable the SD-AVC options since that is not part of the scope of what I am doing now.
The manager will start to change the cluster IP address with the new one that we just selected, these proceeds will take approximately 20 minutes, so be patience, because you will not see changes in the vManager gui, but internally the device will start working on it, also you might be careful because this change will reboot the manager. Once the process is completed, we will see the selected IP address instead of the localhost configuration

This process needs to be done with other two controllers before adding them to the cluster.
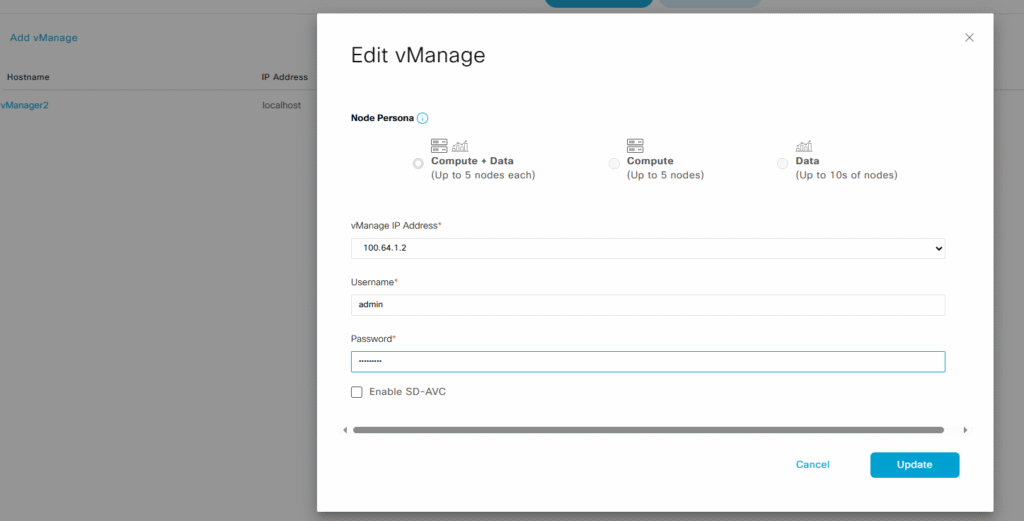
After another 20 minutes… Manager 2 and 3 are ready to be added to the cluster.


Step 4 – Adding Managers to the Cluster
When three manager are ready and all of them are using the IP address that we selected to be used as cluster IP we are good to add the other two managers to the cluster, clicking the add vManager button, we will add one by one the managers to the cluster
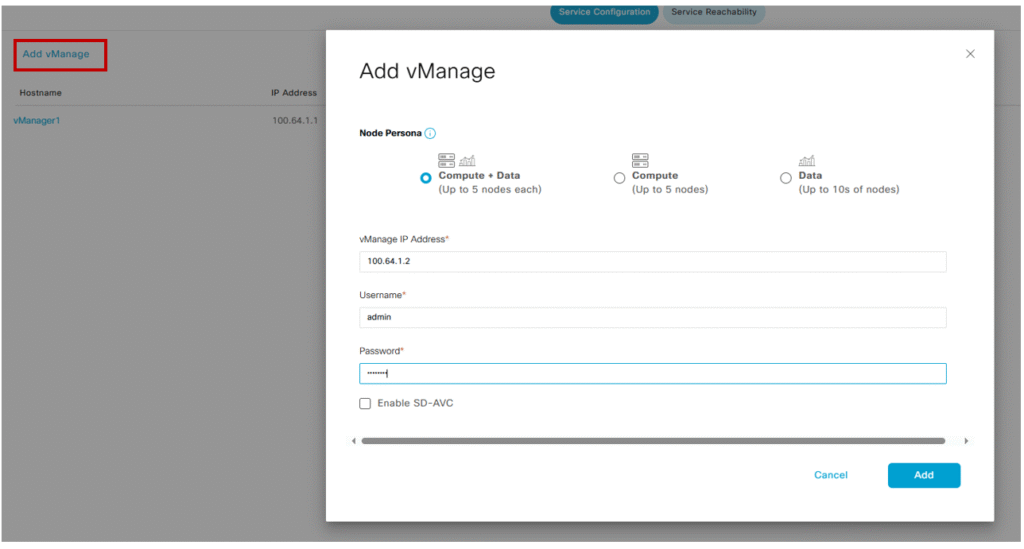
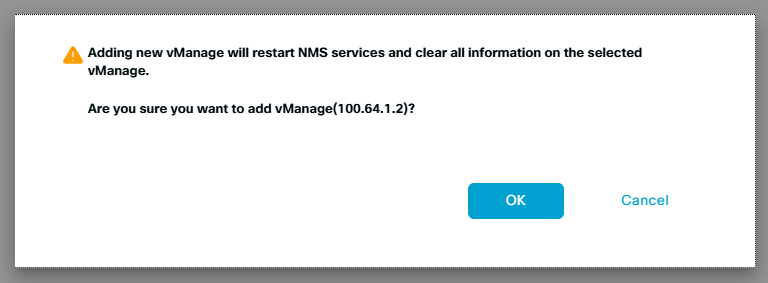
Cisco recommended do not try to add one more device a time, and if everything is in place we will see a green box saying wait for another 30 minutes..

After somewhere between 25 to 30 minutes, the vManager2 will be successfully added to the cluster

I will repeat the same previous step with the vManager3, then I will be waiting until the last device is completely added to the cluster

And once again, after some time we have our three managers running in a cluster mode

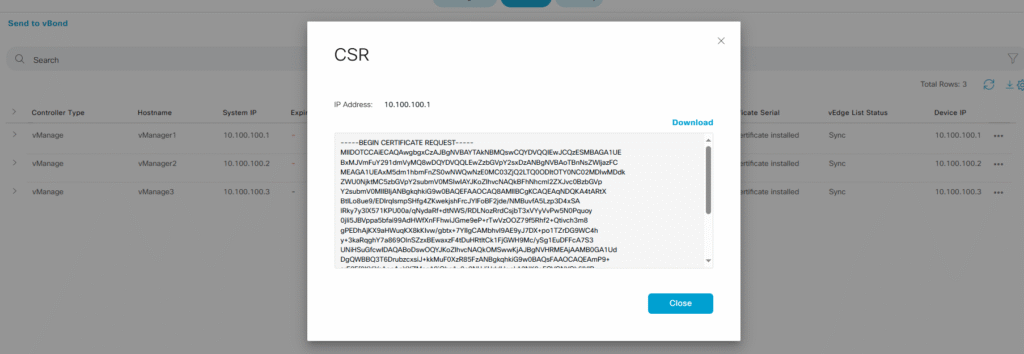
Step 5 – Install Certificates
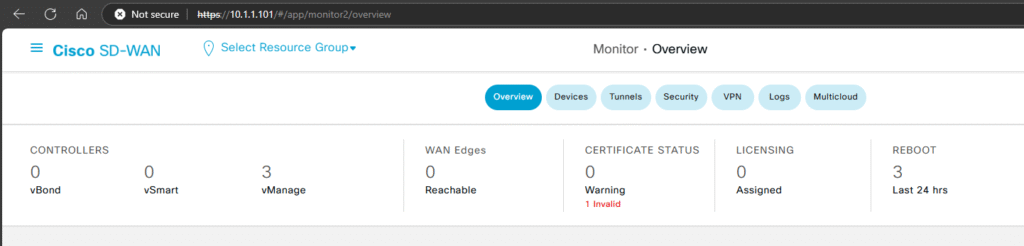
As you can see, we have all three vManagers working together but we are still far of complete the entire process, now we need to generate the certificates for each controller, sign and install them in order to put all the pieces together.
At the beginning of this post, I copied and pasted the root certificate that I will be using to sign all my devices CSR, that information now is available in all my vManagers
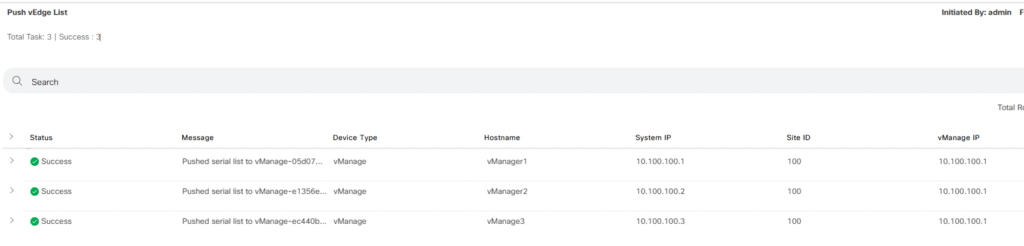
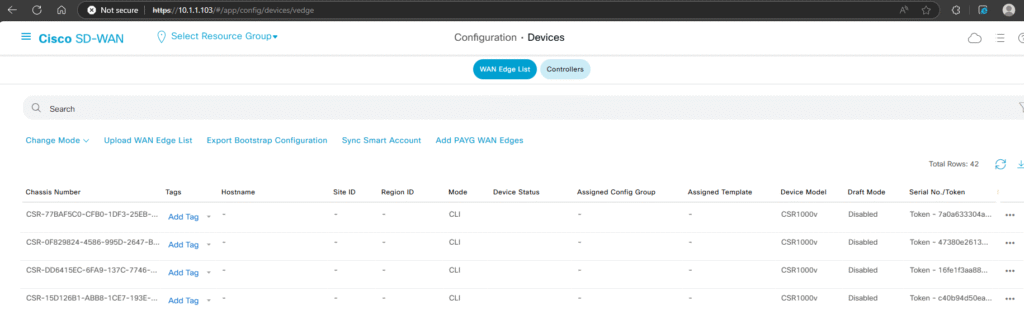
Mini test: As an experiment, I tried to upload the sleick.viptela WAN Edge List to one of my vManagers and see if this list is automatically copied to the other two controllers
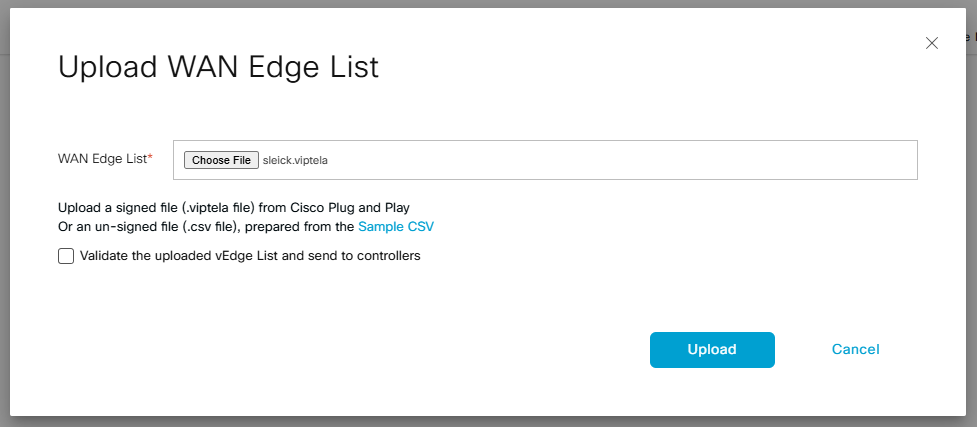
For my own surprise, pushing the WAN Edge list was successfully done and all three vManagers have the list even if I haven’t signed the certificate.
okay! Going back to install the certificate, you can use any CA that you have in your organization to sign all CSR certificates generated by each controllers and Edges, in my case I am using Open SSL for this task, I am not going to spend to much time on this step since this something that usually do when we are adding more devices to our SD-WAN environment.
I will generate each certificate one by one and then I will sign and install them…
I sign it behind the scenes and now I will install it into my vManager:
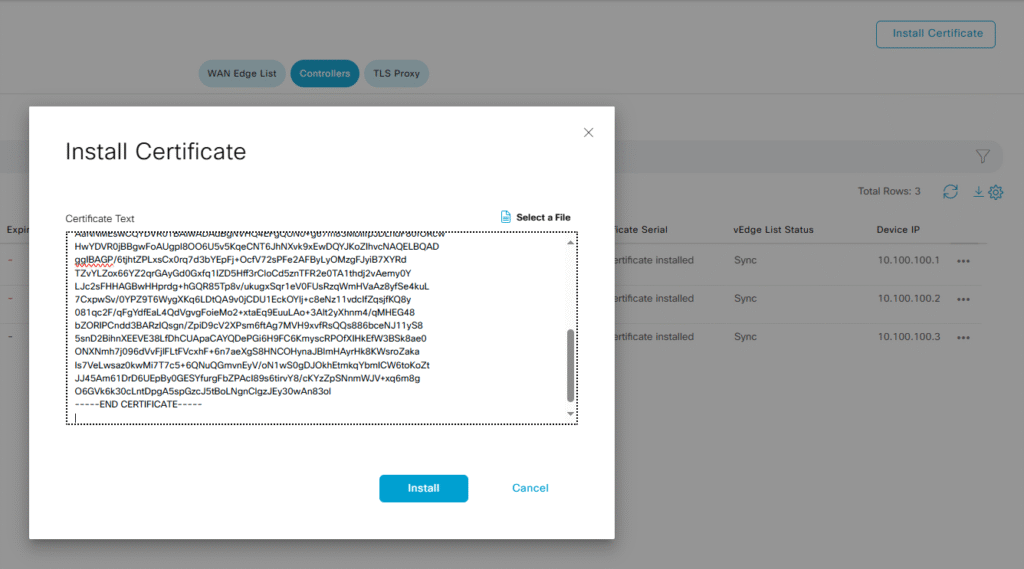

I will do the same previos steps with each controller:

Finally!! we have all three vManagers with its own certificate installed but what is the rest of devices? We need to add the vBonds (now Orquestrator) and the vSmart (Controller), in fact our vManagers are expecting to know something about where is our vBond

This will not be end of this post… In the second part I will add vBond and then the vSmart….